

This articles describes fields you will find in the default translation job editing view: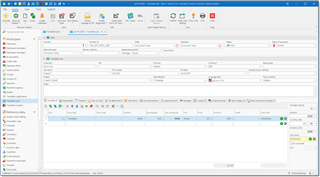
Number
Simple internal number. When a job is created, a new incremental number is assigned automatically. You can enter only numbers here.
Number (f)
Formatted number, which may be generated automatically according translation job numbering settings.
Date
Date of job creation.
Deadline
Deadline of the job. You can specify day and time of delivery. By default, time is set to a time which is specified in the program settings, under Productivity settings tab. This field is displayed on the dashboard. And the row color in the list of projects depends on this field. If delivery day is today, than this project will be marked as urgent (red color). If delivery date is tomorrow, than it will be marked as 'Soon' (green). Other rows would not have any colors. This field has few additional inline buttons: Select from predefined time values and Copy date delivered to deadline.
Status (or Work st. in lists)
Describes the work state of a job. You can choose one of the following statuses: Received, On hold, Processing, Partially finished, Finished, Sent, Cancelled, Rejected.
| Received | Used when the job arrived but still not confirmed (preparing a quote). In this case it is not included into the client's balance |
| Processing | Job is currently in work |
| Finished | A job is finished but has not been sent still |
| Sent | A job is sent and can be invoiced and paid |
| Rejected | project is sent, invoice is issued but for some reason the client rejected to pay. In this case this amount is excluded from the balance with the client. Also, Rejection date field appears to enter the date when the job was rejected. |
| Archived | Allows to lock a job, as it becomes uneditable. Also, you can create custom filter which filters archived jobs out to improve job list loading performance. |
When status is changed from Processing to Sent, Delivery date is set to the current date and time. Also you can transfer data from deadline to delivery date by pressing corresponding button in the Date delivered field.
Status of payment (or Payment st. in lists)
Displays payment state of a job. Usually it changes automatically when you create invoices over jobs and payments over invoices. The following statuses are available: Not invoiced, Invoiced, Partially invoiced, Paid and Rejected.
| Not invoiced | Initially, all jobs get this status by default |
| Invoiced or Partially invoiced | Automatically assigned when you create full or partial invoice over a job |
| Paid | Assigned when you create a full payment (or payments) over all invoices issued over particular job |
| Partially paid | When a job is invoiced and non-full payment exists for at least one invoice |
Delivery method
A simple way to save a method of delivery. This is a drop-down list which is populated on the base of previous values. If necessary value is missing, simply type it here. Next time it will appear in this list.
Post WIWO check-box
Allows to create WIWO (What I am working on now) entry on ProZ.com after saving a job. If to check this mark, then after saving a job WIWO editing window will appear with some pre-filled data. You ill be able to make necessary corrections and select OK to send information to the WIWO service.
Customer and PM
As expected, allow to select a customer and your project manager. After selecting particular customer list of PMs will allow to select only a contact which belongs to a selected customer. By default, when you change a customer, previously used contact will be automatically selected in the PM field.
To quickly view default rates for the currently selected customer, just hover mouse pointer over Customer field (only Windows version). You will see a tooltip with customer's price-list. If tooltip is not shown, this means that this customer has no default rates defined.
Price-list
Allows to explicitly specify price-list for a job, if you wish to use non-default price-list for a selected customer. When you select any value in this field, if a job already contains some tasks, the system will offer you to re-determine price for all tasks.
Currency
Allows to select a currency used to estimate job amount.
Specialization
Allows to specify a specialization of the job. Dividing jobs by work fields (specializations) helps to generate stats and to see the fields in which you perform better. This information could be included in the CV to allow potential clients see statistical expression of your experience, as well as in many built-in and custom reports.
PO number, PO date, Job name and Client ref. number
Purchase order details.
Responsible person
Intended only for teams and allows to select staff member responsible for this job. Later it will be possible to generate reports showing performance of each staff member.
Translation project
Allows to select a project for this particular job. It is a common thing when a project is translated into many languages or implies outsourcing. Also, projects can be used when you get translation jobs from the same client on a regular basis (say, every week), and all of them belong to one big project you work during a long time. Projects are a 'shell' for jobs, allowing to calculate some totals and margins over included jobs and assignments.
Job tasks and Receivables tables
Job description with all actions required by this job, prices and amounts. See separate article describing these tables. When you add or edit rows in the job tasks or receivables tables, job total amounts (at the right of these tables) will be automatically re-calculated. If currency of the project differs from your base currency selected in the profile, then the system will try to get currency rate to convert project amount into your base currency. If the rate is missing in the Currency rates list, then default rate will be used (1). In this case, you can download currency rate by selecting corresponding button onside this field. Or you can open Currency rates list and add missing rate there. Then go back to a job and re-calculate amount.
Checklist tab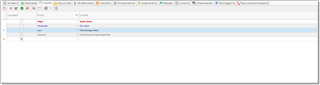
Allows to add to-do items needed to be done before delivering a job. When a job is created, this tab could be filled with contents of a default checklist, which is selected in the application settings.
Instructions tab
Allows you to specify instructions for particular job. It fully supports formatting to highlight important points:
File attachments tab allows to attach job files (source files, reference files, glossaries, TMs, etc.). These files are stored directly in the database and not linked with source files on your hard drive. Also, they can be stored in one of supported cloud drives (Dropbox, Google Drive and Microsoft OneDrive). Once the file is attached, it can be deleted or moved on the hard drive. (but not on cloud drive). Use this function with care, because it leads to database file size growth. Currently, maximum file size in a local mode is 4 Gb. In network mode, file size is unlimited. To attach a file, select on the Add from file.... After selecting a file, specify its type in the File type column by selecting necessary value from the underlying reference table (you may create additional file types on fly). These files are stored inside database, and available to other users who may open this project from another computer or web-version.
On the Files (on disk) tab you may select a local folder where project files are stored. Use this tab if you do not need to provide access to project files to other users. These files are stored only on your computer and not available to others.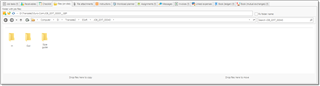
Workload planner
This tab contains work periods for a job. See Workload planner article for detailed information.
When Workload Planner feature is turned on in the Program Settings, this table will be automatically filled when you save a job. You can manually adjust entries created by default. To do this, mark Manual allocation checkbox and make necessary changes in created rows.
To allow automatic planning system to include weekend days (Saturday and Sunday) while allocating a job, mark Allow weekends checkbox.
Start time and End time optional columns allow you to define time period for each working period. By default, the program uses work day periods defined in the program settings under Productivity tab. When Scheduler function is used (turned on on the program settings), the system will create corresponding appointments in the calendar (with specified time periods).
Messages
This tab allows to exchange messages with customer (when using web-version).
On the Linked expenses tab you can create new expense or add existing expense to a job. As a result, some expense will be linked with a job and this expense will be automatically included in an invoice created over this job. Also it will affect on margin amount.
Book (ledger) and Book (mutual exchanges) tabs allow to view records created by a job in a corresponding accounting books. These tables can be edited manually and get filled only after saving a job.