

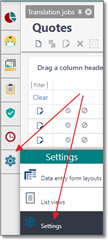
How to open settings
To open application settings, select gear icon from the navigation menu:
 i
i
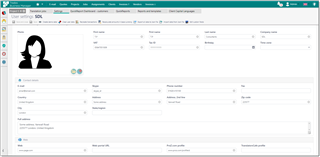
Main data and contact details
Here you specify your name, company name, VAT number, time zone, address, web pages and license code. Also it is possible to upload a photo (which then can be included into your CV, for example).
Integrations
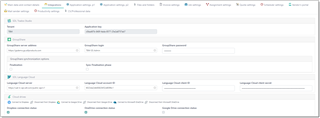
This page allows to configure integration settings with external systems.
SDL Trados Studio
This area displays tenant name and application key needed to be provide in the TBM Connector plugin installed in your SDL Trados Studio to implement direct integration with TBM.
GroupShare
GroupShare server address and login details. required to used GroupShare integration, which is described in a separate section of the manual.
SDL Language Cloud
The same as GroupShare, this section allows to configure connection to Language Cloud.
Cloud drives
SDL Trados Business Manager allows to connect to Dropbox, Google OneDrive and Microsoft OneDrive to insert links and share files stored on cloud drives, without downloading them locally. Here you can use Connect... and Disconnect from... buttons to establish connection with your cloud drive accounts. For example, to connect to OneDrive account, click Connect to Microsoft OneDrive button. Microsoft login window will be opened in a new tab. Select your account, provide login details, and then accept request to provide access to your account. After that you will be moved to a page with your tenant:
Click Copy to clipboard! button and switch back to the TBM tab, where copied code should be inserted:
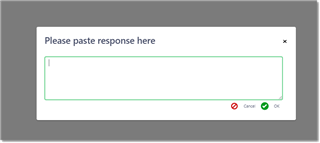
Paste your code and click OK. After that, OneDrive connection status will change, showing that you are connected now to your account:

Application settings, p1
Database file location (only in Desktop version)
Allows to change default database file storage location. By default, database file (named tbmdb.sqlite) is stored in the resources\bin\database folder inside application installation folder. If application is installed to the Program Files folder, then database file will be stored in the Documents\SDL Trados Business Manager folder. You can change default location by clicking ... button in this field. Select new folder and click OK. The application will offer to copy current database file to a new location, and then will be closed. After restart, a new database location will be used. To confirm this, hover your mouse pointer over info icon in the bottom left corner, and you will find database file path in the tooltip:

Enable backup (only in Desktop version)
You can enable automatic backup creation of your database when you close the application. Check this box and select Backup location. Then, save settings and try to close the application. You will notice that a new file will appear in the backup folder, containing timestamp in its name. TBM will create up to 5 backups (during single day, one backup file is created, automatically overwriting any existing backup file created in a same day), automatically deleting all additional backups (starting from 6th). If you need to keep older backups, please copy files to another location manually.
Additionally, you can always create a backup manually by clicking Create backup button on the main toolbar:
Base currency
The base currency is used to convert amounts from different projects (which may be in different currencies) into a single one using today's conversion rate.
For example, choose USD as base currency (as seen in the screenshot). In this case, if you get a project in EUR, than it will contain two total amounts: in EUR and in USD. The amount in EUR will be used to track balances, but the amount in USD will be shown in the total calculations, which involve projects in different currencies. Example: 1st project - total 100 USD (100 USD in the base currency). 2nd project - 100 EUR (~115 USD in the base currency, if the conversion rate is 1.15). Then, the total amount for both projects: 100 EUR and 100 USD (215 USD in the base currency, which for example will be shown in the Dashboard). It is possible to change the base currency when you already have entered some jobs or invoices, but it will require some additional actions to recalculate the base currency for the existing documents.
After saving settings, open the Settings window again and click Recreate transactions on the toolbar. All the amounts will be recalculated into the new base currency (provided you have entered the necessary currency rates).
Many tables in SDL Trados Business Manager contain Amount (base currency) column. This column contains an amount converted to the base currency (if document's currency differs from it). It allows to get meaningful totals in any table, expressed in one single currency. Such columns will be automatically renamed to include your base currency name in brackets.
Earning accounting type
Allows to specify a method of determining a date when creating a record in the Ledger. In other words, a date when earning/expense is accounted.
Possible values are By date and By deadline. In the first case records date in the ledger will be determined by the job date. In the second case - by the job deadline.
Earning accounting method
This setting has three choices: Job-based, Invoice-based and Payment-based. It specifies when to add transactions into the Ledger and Balance sheet.
If the first option is selected, then when a new job is created, you will see increased income and debt from the client. But if you select the second option, job creation will lead to nothing, while invoicing of this job will mean income registration and increase of the debt from the client.
When Invoice-based method is used, the program will also track currency differences in cases when invoices are issued in a currency which is different from base currency.
Example. You issue invoice on some day, specify amount, currency rate and amount in base currency. When a payment arrives, currency rate changes, which means you get different amount in base currency. Depending on direction of the exchange rate change, you may get more or less than expected amount. This difference is called currency difference and must be registered in the Ledger. SDL SDL Trados Business Manager tracks these changes and creates corresponding records in the Ledger on the date of payment arrival.
Financial year start
This setting allows to specify a date when financial year starts in your country. This allows to generate reports by financial year (instead of calendar year), and apply filter in lists of jobs/invoices/assignments/etc. by financial year and month.
Default language pair
You can specify the language direction, which will be applied for all added jobs by default.
Default work type
This work type will be used by default in all job tasks and quote items.
Default fuzzy type scheme
Specifies fuzzy type scheme and corresponding fuzzy discounts which will be applied to default prices during creation of jobs.
Default analysis import settings
Specifies analysis import settings used by default in new projects/quotes/jobs.
Disabling price pick-up mechanism
When you enter a new task in a translation job or assignment, the system tries to determine price based on selected customer, work type and unit.
If explicit price not found, price pick-up mechanism is used to determine a price based on existing data. This mechanism uses adjustment factors you set for work types and units.
For example, if price for Translation in Words is set to 0.1 USD , and you enter a task with Proofreading work type with Words unit (for which 0.33 adjustment factor was set), then the system will determine price according this formula: 0.1 * 0.33 = 0.033 USD.
This checkbox allows to disable this calculation and apply only prices which actually exists in customer's or contractor's price-lists.
Display language pairs as codes
By default, when you select language pair (in a job, assignment, etc.), it is displayed as SourceLanguageName => TargetLangueName.
To save screen space (especially in grids), you can select to display language pairs as codes (example: en-gb => ru-ru). To do this, mark this checkbox, and a shorter notation will be used for language pairs everywhere in the application.
Display languages as flags where possible
For each language you can provide a flag. If it is more convenient for you, TBM could display flags instead of language names or codes. Language name will be displayed as a tooltip when you hover mouse pointer on a flag.
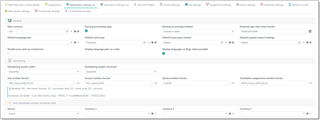
Numbering
These fields (separate for invoices and translation jobs) allows you to set the rules of the new number generation when a new job or invoice is created.
The default value is Sequential, which means that numbers are assigned in sequential order (1, 2…10). Also you can select Per client code value. In this case, each client will have its own numeration, and the document number will include a special prefix (client code).
Invoice/job/quote/assignment number format
These parameters allow you to set-up number generation for each type of document. In SDL Trados Business Manager, document has numerical numbers. To provide ability to represent these numbers in desired form, there is a second string field, which is formed on the basis of specified rules. This is the start of your concept.
You can use any symbols here and a number of variables (numeric document number, date and client code). These variables are placed inside curly brackets. You may also apply additional formatting to each variable by specifying format after a colon sign. For example, if you want to get a number which contains some prefix, followed by 6-digit number and year, use the following string:
prf_{0:d6}_{1:yyyy}
Here is prf is our prefix, followed by variable 0 (document number) formatted as 6 digits, followed by date formatted as four numbers of the year.
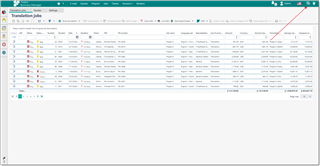
You can see a number of examples below these fields showing how to use these parameters. Also, each field contains a zoom button to test and find out the string format which suits your needs. Also, near the zoom button, there is another button with the arrow which allows to apply formatting string to all documents. For example, you used 4-digits number for jobs (like {0:d4}), but now the number of jobs increased above 10k entries. To re-format all previous numbers, change formatting string to {0:d5} and select Apply format to all jobs. In the result the new format will be applied (for example, number 0345 will turn into00345).
Currently, the following variables are available:
{0} - document number
{1} - document date
{2} - client code
{3} - currency name
Auto download currency exchange rates
Allows to setup automatic downloading of currency rates on the program startup.
Select source of rates and up to three currencies to switch this feature on. Clear values in the Currency 1, Currency 2 and Currency 3 fields to turn this feature off.
Automatically send information about errors to SDL Trados Business Manager developer
This checkbox controls program behavior when any error occurs. When checked, the program will automatically send bug report to the SDL SDL Trados Business Manager server. This report contains information necessary to quickly fix the bug. You can view copy of this information in the SDL Trados Business Manager.log file, which can be found in the SDL Trados Business Manager installation folder. This information does not contain any private data.
Application settings, p2

Custom quick deadline values
Allows to create predefined values for quick selection in fields for entering deadlines (in projects, jobs, assignments).
You can define most commonly used time periods, and values may include not only specified time of a day, but also number of days which will be added to a document date.
Examples: end of day in 3 days; tomorrow's afternoon.
Checklists
In this group you can define default checklists added to a newly created translation projects, translation jobs and translation assignments.
Main service types
In different parts of the application, it is obligatory for system to know, which service corresponds to Translation, Proofreading and Editing work types. In this group you can set this correspondence.
Notifications
You may send notifications to necessary users about created/edited projects and jobs.
For example, when administrator create some project, selected responsible person or all managers of your organization could get notifications about this action. Notifications appear when user logs in into application (or during 10 minutes, if a user is already logged in). The only requirement to make notifications working is to link your staff members created in the Contractors list, with users created in a Users list. For this, Associated contractor field of a user entity is used. System considers all users with Contractor employment type as managers.
In this group of settings, you may specify if system should send notifications to all managers when someone creates or changes status of translation projects and translation jobs.
Audit trail settings
This section allows to enable or disable audit trail functionality in the following entities:
- Quotes
- Translation projects
- Translation jobs
- Translation assignments
- Invoices
- Incoming invoices
- Payments
- Outgoing payments
See Audit trail article for detailed information.
Files and folders
On this tab, you can configure file storage parameters.

Base folders
TBM stores files on a hard drive, by creating nested folders inside one main storage folder. Each entity type could have own folder (for example, Jobs for translation jobs). In this group, you specify these base parameters. It is highly recommended to set these values prior actual usage of the software, as it will be easier to manage files if your store them in a single base folder. However, if you change values of these settings when you already have some documents with attached files, they won't be moved automatically.
Then, you can specify separate settings for quotes, projects, jobs, assignments and invoices, in corresponding groups. Each group contains two parameters: Folder name template and Nested folders. In a folder name template, you can use variables listed below a field. To use any variable, find it in the list and type its name in the field (using curly brackets, as shown). For Date variable, you can apply additional formatting using default .NET formatting rules (can be found here). In the Translation projects group, for the Project number variable, you can apply additional formatting for numeric fields (description can be found here). To apply additional formatting, use the following notation: {1:formatting}. Some examples can be found in the Application settings article.
When you specify folder name template, you can configure it to create folder not directly inside Default folder with work files, but in some nested folder. To do this, simply type '\' in a template. For example, this pattern will put job files into Jobs\2019\Customer1\0001 folder: Jobs\{1:yyyy}\{2}\{0}.
If you wish to put files into single base folder and do not create separate folders for individual entities, then you can specify '\' value in this field. However, it is highly not recommended to do that (maybe except invoices, as usually each invoice has only one file attached).
Available variables for quote folders:
{0} - quote number, {1} - quote date, {2} - client name, {3} - client code, {4} - specialization category, {5} - specialization, {6} - quote name, {7} - source language.
Available variables for translation project folders:
{0} - project number, {1} - project date, {2} - client, {3} - client code, {4} - specialization category, {5} - specialization, {6} - project name, {7} - PO number, {8} - source language, {9} - base quote folder
Available variables for translation job folders:
{0} - job number, {1} - date, {2} - client, {3} - client code, {4} - specialization category, {5} - specialization, {6} - job name, {7} - project name, {8} - PO number, {9} - project number, {10} - base project folder, {11} - base quote folder
Available variables for translation assignment folders:
{0} - assignment number, {1} - assignment date, {2} - vendor name, {3} - base job folder, {4} - base job number, {5} - base project folder, {6} - base project number.
Available variables for invoice folders:
{0} - invoice number, {1} - invoice date, {2} - client name, {3} - client code
Nested folders option allows to create additional folders inside main quote/project/job/assignment folder. To create a folder, type its name and press comma. After this, folder name will be converted into token. Nested folders can also be nested. For example, to create Style guide folder inside Reference files folder, type this: Reference files\Style guide.
Invoice settings
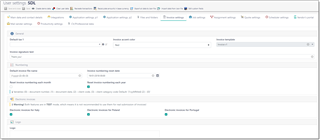
Default tax. This tax will be automatically added to all rows in the invoices. Of course, you can delete tax in particular rows or select another one. To make it possible to choose the default tax, please add it in the 'Taxes' reference data.
Invoice accent color. This is the main color used to style elements in your invoices.
Invoice template. Here you can select the invoice template. There are 7 built in templates, and you can create any number of custom templates using built-in template designer. Additional details about the invoice designer can be found in the corresponding section of this manual .
Invoice signature text. This text is added to the bottom of the printed invoice. Usually it contains some kind of 'thanks' to your clients.
Invoice numbering settings group contains the following parameters. Numbering reset date option allows to select a date, from which the program should start new numeration chain for invoices. Reset numbering each year and Reset numbering each month check-boxes allow you to have a new numeration sequence each year or month.
Electronic invoices group allows to enable features to generate electronic invoices for Italy and Poland.
The last field, Logo, allows to select an image file to display it in generated invoices.
Job settings

Reset numbering each year
This checkbox allows to have a new numeration sequence each year.
Default unit
Allows to specify a unit which will be automatically pre-selected in all tasks created in translation jobs (including 'Prefill fuzzy types' command).
Assignment settings
Default payment type for vendors
For each vendor, you may specify default method of calculating job cost. It could be price-list, amount of source job or work time. This field allows to set default value used for newly created vendors.
Default PO template
Allows to specify PO template used by default when application generates purchase order automatically (all cases except clicking drop-down button near Print button for an assignment).
PO number format
Allows to specify a rule to generate PO number in translation assignments. It also supports a number of variables which can be used in the same manner as number formats described above. To turn off PO number generation function, please leave this field empty.
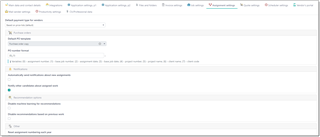
Automatically send notifications about new assignments
Allows to send a message using default Assignment confirmation template (see message templates) to a contractor when a new assignment is created and confirmed.
Notify other candidates about assigned work
This setting allows to enable feature, which automatically sends notifications to all candidates who still didn't answer if some vendor gets assigned to an assignment. Notification text is contained in a message template with 'Use as default for' value set to 'Automated notification - notification to candidate that a job was assigned to another vendor'.
Disable machine learning for recommendations and Disable recommendations based on previous work
Reset numbering each year
Allows to start new numeration sequence for translation assignment on the 1st of January of each year.
Quote settings

Default quote template
Default template used to generate quotes. You can also specify default quote templates for individual customers (in their respective editing views).
Default payment terms
Specifies default payment policy applied in all created quotes (except those which were created by Clone function).
Always create a project on accepting a quote
By default, when accepting a quote, the system creates translation project with multiple jobs if a quote includes multiple target languages. However, if a quote contains only one language pair, the system will create just one translation job when accepting a quote, without creating a translation project. This option allows to change behavior and force the system to always create translation projects when accepting quotes, even if they contain only one language pair.
Scheduler settings

The Scheduler settings tab group contains a few parameters. Calendar type field allows to select a service you use for scheduling: Google Calendar or Outlook Calendar.
Translation jobs group contains parameter for creating events in the built-in scheduler and syncing them with cloud calendar.
Invoices group, correspondingly, contains similar parameters for invoice.
Use built-in scheduler option allows to turn built-in scheduler on or off (On by default). When turned off, job/invoice saving will be slightly faster.
Sync with online calendar option allows to enable or disable Google Calendar or Outlook Calendar synchronization. On the first attempt to sync, a browser window will be opened to login into your Google or Outlook account. After that, the program will be able to synchronize automatically. Please note that SDL Trados Business Manager only sends data to the Google Calendar, but does not import your existing entries.
Sync with Workload Planner option allows to create multiple records in a calendar according information contained in the Workload Planner tab of a job. System can help with planning periods of working on a job according your pre-defined work day period. When this option is checked, instead of one long entry which lasts from job date until job deadline, the program will create corresponding calendar entry for each day spanned over defined work period.
Create entries only for delivery time. When checked, system will create an event in the calendar only for delivery time (1 hour before delivery), instead of an event spanning from starting time to deadline time.
The Default scheduler entry contents. When a new translation job or invoice is created, the system creates the corresponding appointment in the scheduler (and in your cloud calendar, if needed). This parameter allows to adjust the text used as a header (summary) for that appointment.
For jobs, you can use the following variables in this text: {0} - project number, {1} - project date, {2} - project name, {3} - client name, {4} - work field, {5} - average volume.
For invoices, the following variables are available: {0} - invoice number, {1} - invoice date, {2} - invoice due date, {3} - client name, {4} - amount due, {5} - currency name.
Vendor's portal

Allow self-registration for vendors. When checked, login form on your vendor's portal will contain Register button, allowing users to self-register and fill personal data. Managers will receive notifications about newly registered users.
Allow vendors to edit only empty fields. It has effect only for web-version. When checked, vendors will be able to edit only empty fields in their profiles, while fields which already contain any information will be disabled for editing.
Mail sender settings

Constant recipients
Allows to specify comma-separated list of e-mail addresses, which will always be added to BCC field of all messages sent via built-in Mail sender.
Send copies of mail messages to myself
When checked, all messages sent from SDL Trados Business Manager will also be sent to an e-mail address specified on the Main data and contact details tab.
Total size limit for mail attachments, Kb
Allows to set limit for file attachments allowed to be sent with a message. Especially useful when mail message is generated automatically, when the process is not controlled by a user.
Auto-upload to cloud drives section
Cloud drive
Allows to select cloud drive service used to automatically upload large files from Mail sender. To completely turn this feature off, select None in this field. If you select any cloud service here, be sure to correctly establish connection with chosen service on the Integrations tab.
File size limit
Allows to specify minimum size of files in megabytes to use cloud auto-upload feature. Files with lower size will be simply attached to a message.
Auto-upload path
Allows to specify folder where uploaded files will be stored. Folders can be nested (for example, Mail/Attachments).
Links header
When application will upload files to hard drive and insert links to a message text, additional header before this text can be added, which is specified by this parameter. For example: "Links to download files:".
Productivity settings
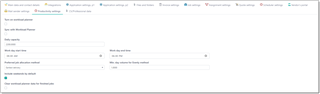
Turn on workload planner check-box allows to start using a feature which helps to track daily workload and facilitate in decision making process about accepting new jobs. You can read detailed information about this feature in the Workload planner article.
Daily capacity specifies your daily outcome. It is calculated in weighted units. This means that each quantity is converted into some average volume using adjustments factors. For example, 1 hours may correspond to about 500 translated words, or 1000 proofread words may correspond to 300 translated words. Adjustment factors are set in the Units list.
Workday start/end time fields allow to specify your normal working day. Workday end time is used to automatically set time when determining deadline during job creation.
Preferred job allocation method allows to select one of methods to automatically allocate jobs in the workload planner. Possible choices are Earliest delivery, Latest delivery or Evenly.
Clear workload planner data for finished jobs
This option allows to erase workload planner information when translation job status changes to Finished or Sent. It could be useful if you wish to clear picture in the Workload planner window, and see there only jobs which are actually in work now.